다양한 플랫폼을 참고해보면 글 리스트에서 다양한 데이터가 첨부되어 있습니다.
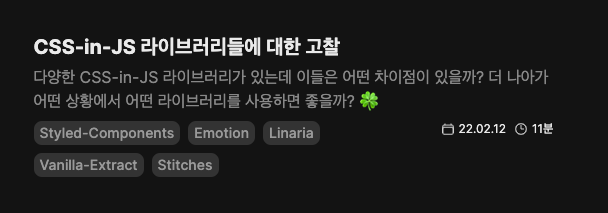
- 글 제목
- 글 설명
- 글 작성 시간
- 태그
- ...
사용하게 될 라이브러리 소개
yarn add dayjs
yarn add -D gray-matter reading-time
gray-matter
https://github.com/jonschlinkert/gray-matter
텍스트 중 front-matter를 파싱해주는 도구입니다.
보통 여기에 글에 대한 추가정보를 작성해둡니다.
---
title: 포스트 제목
---
사실 이후에 mdx 파일을 html 파일로 파싱할 next-mdx-remote 라이브러리에서 front-matter도 추출할 수 있습니다. 하지만 front-matter만 알고 싶은데 일일이 html 파일로 파싱하는 것은 너무 비효율적인 작업입니다.
dayjs
https://github.com/iamkun/dayjs/
moment보다 가볍고 쉽게 날짜를 다룰 수 있습니다.
2023년 1월 1일 일요일, 1년 전 같이 한글 날짜에 대한 포멧팅도 쉽게 지원이 됩니다.
import 'dayjs/locale/ko';
import dayjs from 'dayjs';

dayjs.locale('ko');

export default function App({...}) {
  // ...
}
reading-time
https://github.com/ngryman/reading-time
markdown 혹은 html의 읽기 추정 시간을 계산해 줍니다.
한글은 조금 글게 측정되는 경향이 있는 것 같습니다.
글 파싱
이제 지난 글에서 작성했던 코드 기반으로 이어서 작업해봅시다.
import { sync } from 'glob';
import path from 'path';

const BASE_PATH = '/posts';
const POSTS_PATH = path.join(process.cwd(), BASE_PATH);

const parsePost = (postPath: string) => {
  return {
    // ...
  }
}

export const getAllPosts = () => {
  const postPaths: string[] = sync(`${POSTS_PATH}/**/*.mdx`);
  return postPaths.map(parsePost);
};
파싱할 데이터 정의
어떤 데이터를 표시할지 미리 구상을 해둬야 합니다.
우선 아래 데이터가 파싱되도록 타입을 정의해봅니다.
type PostMatter = {
  title: string;
  description: string;
  tags: string[];
  draft?: boolean;
  date: string;
};

type Post = PostMatter & {
  slug: string;
  content: string;
  readingMinutes: number;
  wordCount: number;
};
데이터 파싱
readFileSync를 활용하여 파일을 조회하여 gray-matter에게 전달해주면 됩니다.
import dayjs from 'dayjs';
import fs from 'fs';
import matter from 'gray-matter';
import readingTime from 'reading-time';

//...

const parsePost = (postPath: string): Post | undefined => {
  try {
    const file = fs.readFileSync(postPath, { encoding: 'utf8' });
    const { content, data } = matter(file);
    const grayMatter = data as PostMatter;

    if (grayMatter.draft) {
      return;
    }

    return {
      ...grayMatter,
      tags: grayMatter.tags.filter(Boolean),
      date: dayjs(grayMatter.date).format('YYYY-MM-DD'),
      content,
      slug: postPath.slice(postPath.indexOf(BASE_PATH)).replace('.mdx', ''),
      readingMinutes: Math.ceil(readingTime(content).minutes),
      wordCount: content.split(/\s+/gu).length,
    };
  } catch (e) {
    console.error(e);
  }
}
파싱에 실패할 수 있기 때문에 getAllPosts에도 예외처리 해줍니다.
export const getAllPosts = () => {
  const postPaths: string[] = sync(`${POSTS_PATH}/**/*.mdx`);
  return postPaths.reduce<Post[]>((ac, postPath) => {
    const post = parsePost(postPath);
    if (!post) return ac;

    return [...ac, post];
  }, []);
};
(번외) 글 작성 꿀팁
매번 front-matter 정보를 다른 글에서 복사해오긴 귀찮고 데이터 스키마가 변동될 수 있어 관리하기 어렵습니다.
vscode에 custom snippets을 추가해두면 도움이 될 것입니다.
아래처럼 설정하면 해당 레포에서만 단축키를 사용할 수 있게 됩니다.
{
  "Post Matter": {
    "prefix": ["matter", "---"],
    "description": "Output a file header with the file name and date",
    "body": [
      "---",
      "title: '$1'",
      "description: '$2'",
      "icon: ''",
      "image: ''",
      "tags:",
      "  - $3",
      "draft: false",
      "date: $CURRENT_YEAR-$CURRENT_MONTH-$CURRENT_DATE $CURRENT_HOUR:$CURRENT_MINUTE:$CURRENT_SECOND",
      "---",
      "",
      "$0"
    ],
    "scope": "md,mdx"
  },
  "Current DateTime": {
    "prefix": ["current_date_time", "cdt"],
    "description": "Output current DateTime YYYY-MM-DD HH:mm:ss",
    "body": "$CURRENT_YEAR-$CURRENT_MONTH-$CURRENT_DATE $CURRENT_HOUR:$CURRENT_MINUTE:$CURRENT_SECOND"
  },
  "Current Date": {
    "prefix": ["current_date", "cd"],
    "description": "Output current Date YYYY-MM-DD",
    "body": "$CURRENT_YEAR-$CURRENT_MONTH-$CURRENT_DATE"
  }
}


Next.js로 블로그 만들기